Having an SSL certificate for your domain is crucial for the modern web. Google prioritizes secure domains (HTTPS) over non-secure domains (HTTP) in search results, and most web browsers now add a label to non-secure websites warning visitors of the lack of security. Users have come to expect every website they visit to be using HTTPS rather than HTTP. In this guide, I’ll show you two ways how to force HTTP to HTTPS redirect in WordPress using two different methods.
SSL certificates used to be extremely expensive, but nowadays there are so many SSL providers to choose from, as well as free SSL certificates from Let’s Encrypt, that you really don’t have any excuse not to have one on your domain.
Once you have an SSL certificate installed, you need to make sure all of your website visitors (and search engine spiders) are directed to the HTTPS version of every page. If you don’t implement redirects, Google will crawl and index both the HTTPS and non-HTTPS versions of each page of your site, resulting in duplicated & diluted page rankings.
There are two options to force HTTP to HTTPS redirect in WordPress:
- Using a WordPress plugin
- Modifying the .htaccess file (requires access to domain host)
Option 1 – Force HTTPS using a WordPress plugin
Using a WordPress plugin to redirect HTTP to HTTPS is the easiest option, and can be done without editing any website code.
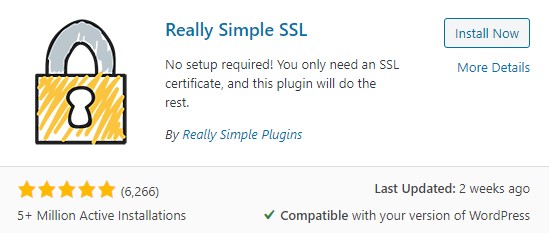
In your WordPress admin dashboard, go to Plugins -> Add New. Search the plugins for “Really Simple SSL”, and install the plugin of the same name. Don’t forget to click Activate once the plugin has installed.

After you have activated the Really Simple SSL plugin, it will display a checklist for you to go through before enabling the plugin. The points you should take note of are to ensure any hard-coded references to HTTP in your website .css and .js files are changed to HTTPS.

When you’re ready to continue, click on “Go ahead, activate SSL!”
And that’s it! Really Simple SSL will now take care of forcing all HTTP requests to HTTPS. You can test this out my typing in the non-secure version of your website URL in your browser (e.g. http://mywebsite.com), and it should re-direct you to the secure version (e.g. https://mywebsite.com)
Option 2 – Modifying the .htaccess file
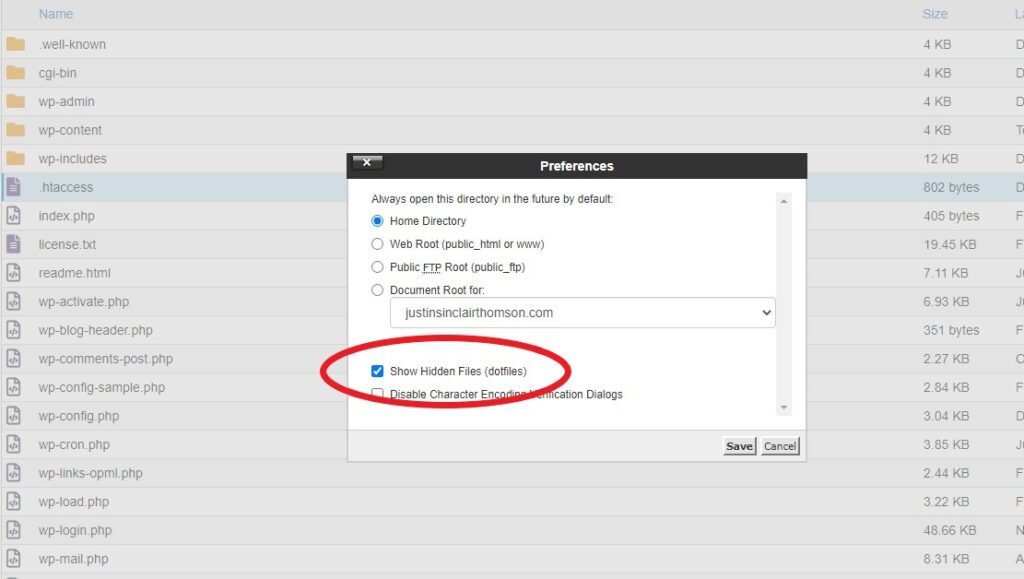
This method of forcing HTTP to HTTPS redirects assumes you have access to our website host files (e.g. cPanel). In your cPanel, open the File Manager and navigate to the ‘public_html’ directory. You should see a file called “.htaccess in this directory”. If you do not see the file, it might be because the directory is not displaying hidden files. To view hidden files, click on ‘Settings’ in the top right corner of the cPanel File Manager and check the box next to “Show Hidden Files (dotfiles).

Once you’ve located the .htaccess file, right click on it and choose Edit to edit the file directly in the cPanel File Manager. The .htaccess file should already have some default content in it from WordPress, which looks something like this:
# BEGIN WordPress
# The directives (lines) between "BEGIN WordPress" and "END WordPress" are
# dynamically generated, and should only be modified via WordPress filters.
# Any changes to the directives between these markers will be overwritten.
<IfModule mod_rewrite.c>
RewriteEngine On
RewriteBase /
RewriteRule ^index\.php$ - [L]
RewriteCond %{REQUEST_FILENAME} !-f
RewriteCond %{REQUEST_FILENAME} !-d
RewriteRule . /index.php [L]
</IfModule>

# END WordPress
To force the HTTP to HTTPS redirect, you’ll need to add the following snippet of code to your .htaccess file:
RewriteCond %{HTTPS} !=on
RewriteRule ^ https://%{HTTP_HOST}%{REQUEST_URI} [L,R=301]
You need to paste in these two lines directly after “Rewrite Base / ” in the file, and then move the comment “# BEGIN WordPress” to below it. Your .htaccess should look similar to this once you have pasted in the two lines and moved the placement of the “# BEGIN WordPress” comment:
# The directives (lines) between "BEGIN WordPress" and "END WordPress" are
# dynamically generated, and should only be modified via WordPress filters.
# Any changes to the directives between these markers will be overwritten.
<IfModule mod_rewrite.c>
RewriteEngine On
RewriteBase /

RewriteCond %{HTTPS} !=on
RewriteRule ^ https://%{HTTP_HOST}%{REQUEST_URI} [L,R=301]

# BEGIN WordPress
RewriteRule ^index\.php$ - [L]
RewriteCond %{REQUEST_FILENAME} !-f
RewriteCond %{REQUEST_FILENAME} !-d
RewriteRule . /index.php [L]
</IfModule>
# END WordPress
Finally, save the file on your server, and test the redirect in a new Incognito browser window. Try accessing your website on the non-HTTPS domain (eg. ‘http://mywebsite.com’), and you should notice your browser automatically redirects you to the HTTPS version of the page.
If you have issues with the .htaccess implementation, you may need to contact your website hosting provider for troubleshooting. I strongly recommend using a WordPress plugin such as Really Simple SSL rather than modifying the .htaccess file.

Be First to Comment