If you connect MailChimp to your WordPress website, you’ll be able to take advantage of all of MailChimp’s marketing tools such as pop-up subscriber forms on your site, and custom audiences for Google remarketing ads.
MailChimp’s official guide instructs you to modify your WordPress theme’s header.php file to implement this, however doing this can cause issues when updating your website theme in future. Using a WordPress plugin, we can connect MailChimp to a WordPress site without needing to edit any of our website code.
“Can you use Google Tag Manager (GTM) to connect MailChimp to WordPress?”, you might ask. Unfortunately, it is currently not possible to implement MailChimp’s code snippet using Google Tag Manager. Tags added via GTM are executed on your website using JavaScript. MailChimp’s site verification tool does not execute JavaScript tags from GTM when it verifies your domain, so it is unable to find any tags implemented using Google Tag Manager. For this reason, MailChimp’s code snippet needs to be added directly into the header section of your website.
To do this, you’ll need to install a WordPress plugin that allows you to insert code in the <head> section of every page of your site. My preferred plugin for this purpose is ‘Tag Manager – Header, Body And Footer’ by YYDevelopment. I describe the process of installing this WordPress plugin in my article about installing the Google Tag Manager container in WordPress.
Step 1 – Generating the MailChimp code snippet
To get started, sign in to your MailChimp account and click on the Integrations menu icon:
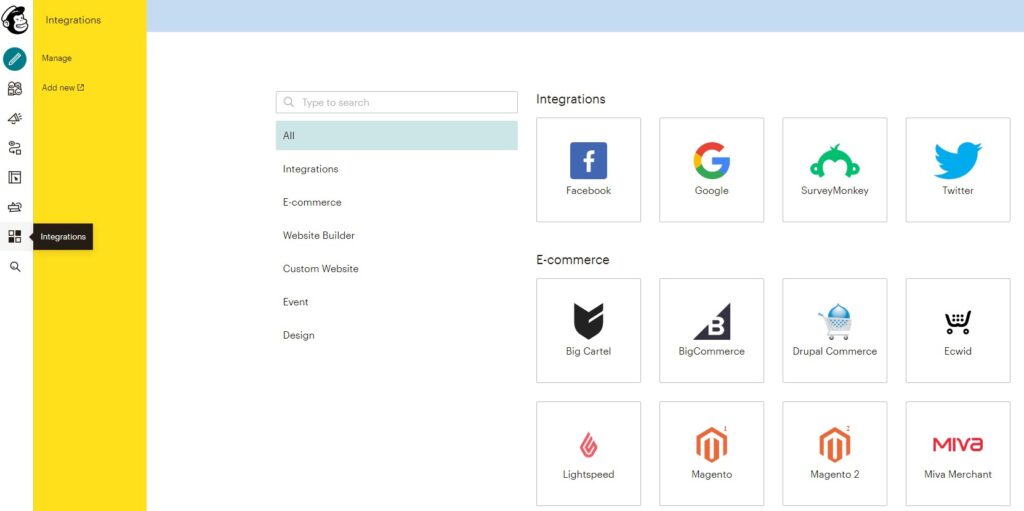
Click on the “Website Builder” category to locate the WordPress integration, or search for it in the search box. On the WordPress integration page, ensure your site URL is correct, and select the audience list you want to connect your site to:
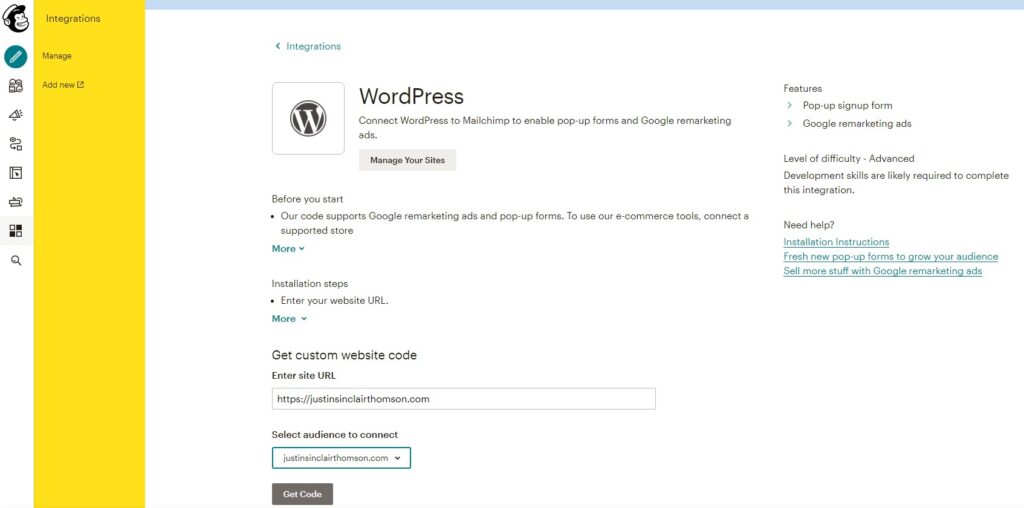
Finally, click the ‘Get Code’ button to generate your code snippet. MailChimp will display the code snippet needs to be placed in your website code so that it is present in between the <head> tags on all pages.
Step 2 – Adding the MailChimp code snippet to WordPress
With your MailChimp code snippet generated, log in to your WordPress admin dashboard and go to the settings for the Tag Manager plugin you installed. You should see it in the left menu bar:
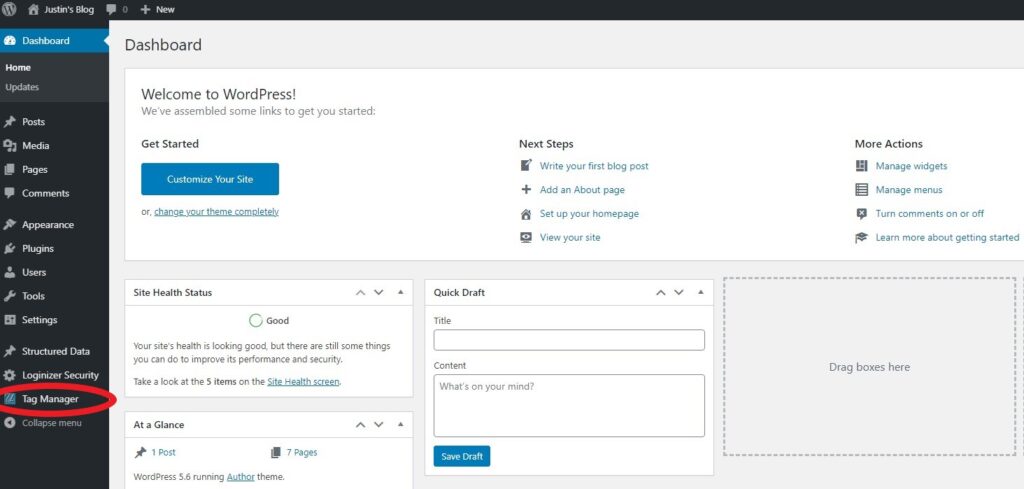
On the Tag Manager page, you’ll see you have three areas available for inserting code:
- Between the <head> tags.
- Immediately after opening <body> tag.
- Immediately before closing <body> tag.
For the MailChimp code snippet, we’ll only need to use the first area – between the <head> tags. Copy the full code snippet generated earlier in MailChimp into the first canvas area on the Tag Manager plugin page. Your page should now look something like this:

Scroll down to the bottom of the page and click the button “Insert/Update Tags” to save your changes.
Step 3 – Verifying the integration in MailChimp
After saving the changes in WordPress, you can now test the integration from your MailChimp account. Go back to the WordPress integration page in your MailChimp account and click the “Check Connection” button to see if the integration was successful.

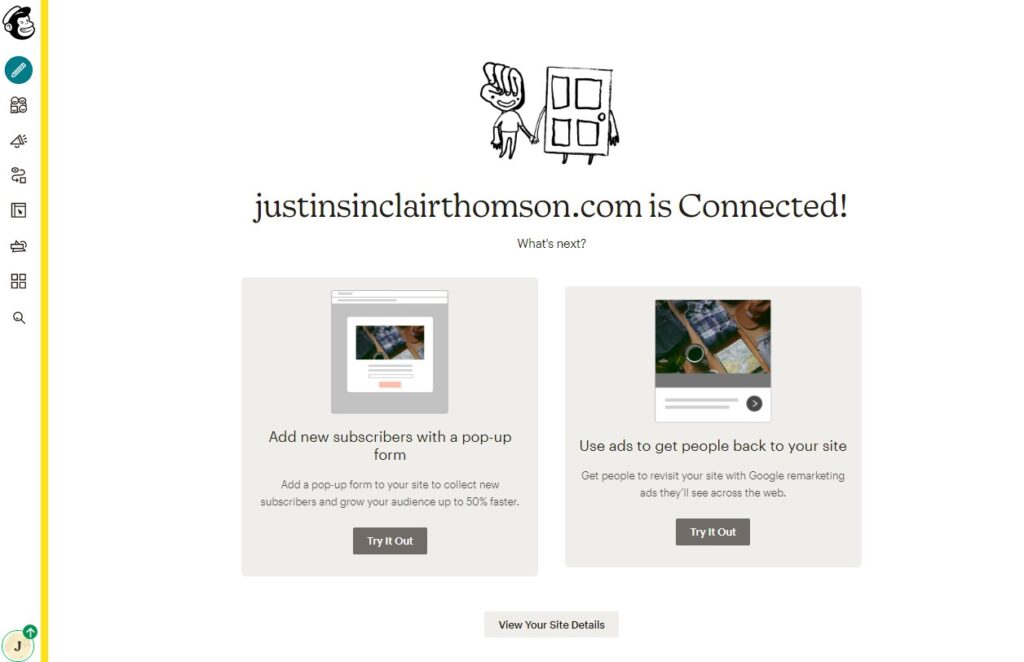
If your integration was successful, MailChimp will display a page informing you that your domain has been connected. You’re now ready to start publishing MailChimp pop-up subscriber forms on your site, and to start targeting your audiences with Google remarketing ads.
Having issues with your MailChimp integration? Drop a message in the comments below and I’ll do my best to assist you.

Be First to Comment