If you manage a WordPress website, you’ll need to know how to install and setup Google Tag Manager in WordPress. Google Tag Manager (or GTM) drastically simplifies the process of managing HTML and Javascript tags across your website pages.
Using Google Tag Manager, we are able to implement tracking tags such as Google Analytics and the Facebook Pixel without having to modify any of our website code. I also use GTM for my client’s websites to dynamically inject meta tags, modify canonical URLs, add structured data, and more, but I’ll get into its capabilities in a separate blog post.
Installing Google Tag Manager on a WordPress website is a simple process, with a selection of free plugins available to assist.
Step 1 – Creating a new Google Tag Manager account
Before getting started, we’ll need to first create a GTM account and container. This process will give us the two code snippets that we’ll need later when installing GTM on our WordPress site.
- Visit tagmanager.google.com and sign in with your Google account.
- Click on ‘Create Account’ to create a new Tag Manager account.
Next you’ll be asked to enter in a few details about your website.
- For ‘Account Name’ type in the name you use to refer to your website.
- Then you’ll need to select your country.
- Under ‘Container Setup’, create a container name using your website url address (e.g. mywebsite.com).
- Next, you’ll need to select a Target platform. GTM can be used for websites, as well as iOS and Android mobile apps, but for our WordPress site we’ll select the ‘Web’ targeting platform.
- Finally we can click on the ‘Create’ button and accept Google’s T’s & C’s to complete the account creation process.
Step 2 – Installing Google Tag Manager in WordPress
After we have created our GTM container in the previous step, we can then see the code snippets that we’ll need to add to our website along with instructions from Google:
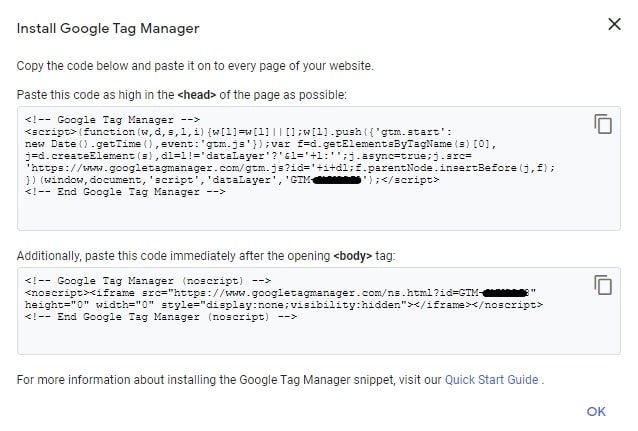
Keep this page open as we will need to use these two code snippets shortly. As stated in Google’s instructions, the first code snippet needs to be placed in the <head> of every page (as high up as possible), and the second code snippet needs to be placed immediately after the opening <body> tag.
Installing this code manually would require editing our template files, which could cause all sorts of problems. Thankfully, we can rather add the code to our website with the help of a WordPress plugin.
Installing a Tag Manager plugin in WordPress
The WordPress community has created dozens of free plugins that can be used to easily install the Google Tag Manager code snippets to WordPress without having to touch a line of code.
To find a suitable WordPress plugin, log in to your WordPress admin dashboard and go to Plugins -> Add New.
- Search the plugins list for ‘Tag Manager – Header, Body And Footer’ and find the plugin of the same name created by YYDevelopment, then click on ‘Install Now’.
- After the plugin is installed, click on ‘Activate’ to enable it.
Adding our GTM code snippets to WordPress plugin
We’re now ready to add the GTM code snippets to our WordPress plugin. To go to the settings for our newly installed plugin, click on ‘Tag Manager’ in the left menu column of your WordPress admin dashboard.
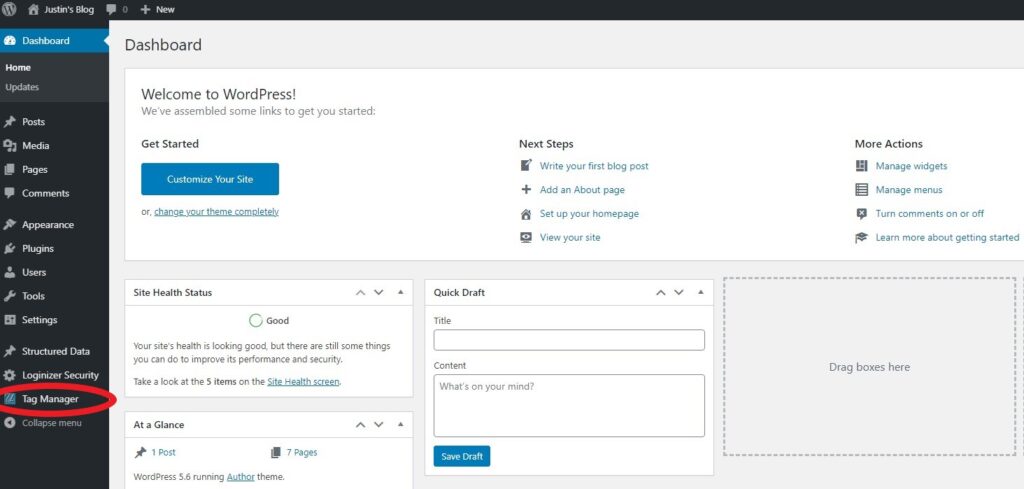
The plugin gives us areas to insert code into three places – between the opening and closing <head> tags, immediately after the opening <body> tag, and before the closing </body> tag. We’ll only need to use the first two places for our Google Tag Manager code snippets.

Next we’ll need to copy & paste the two code snippets we generated in Google Tag Manager into the first two areas of the WordPress plugin. Copy the first code snippet from GTM into the first block, and the second code snippet into the second content block. The plugin page should look like this once you have added your code snippets:

After adding the tags, be sure to click on the button “Insert/Update Tags” to save your changes. You should see a message saying “The data was inserted successfully” if your save was successful.
Step 3 – Publishing the GTM container
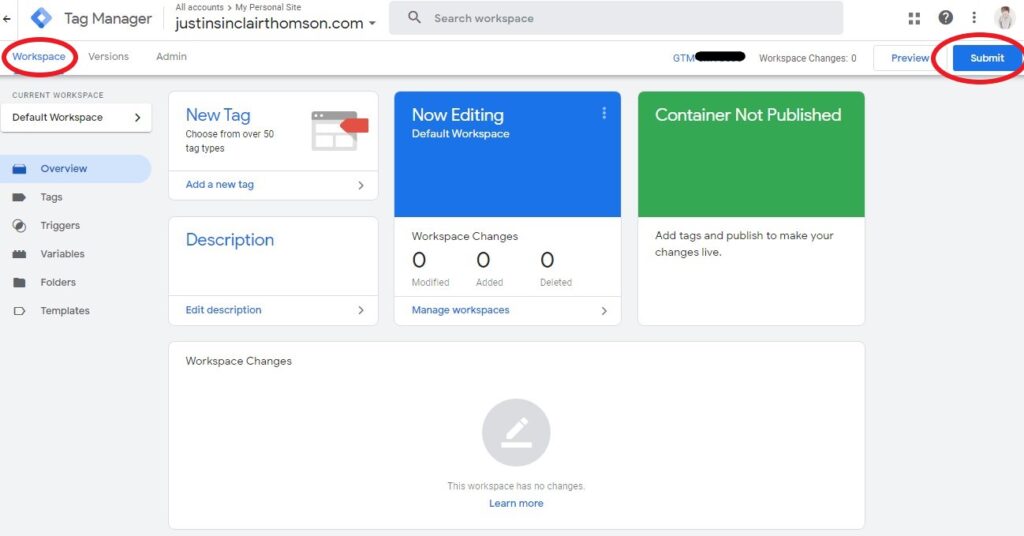
Going back to Google Tag Manager, click on the Workspace tab in the top menu, and then click the blue “Submit” button in the top right corner.
You can then add a name and description to the publishing version, although this is only optional. When you’re ready to publish, click on the blue “Publish” button in the top right corner. You’ll be asked again to optionally add any notes, once you are done then click Continue to complete the process.
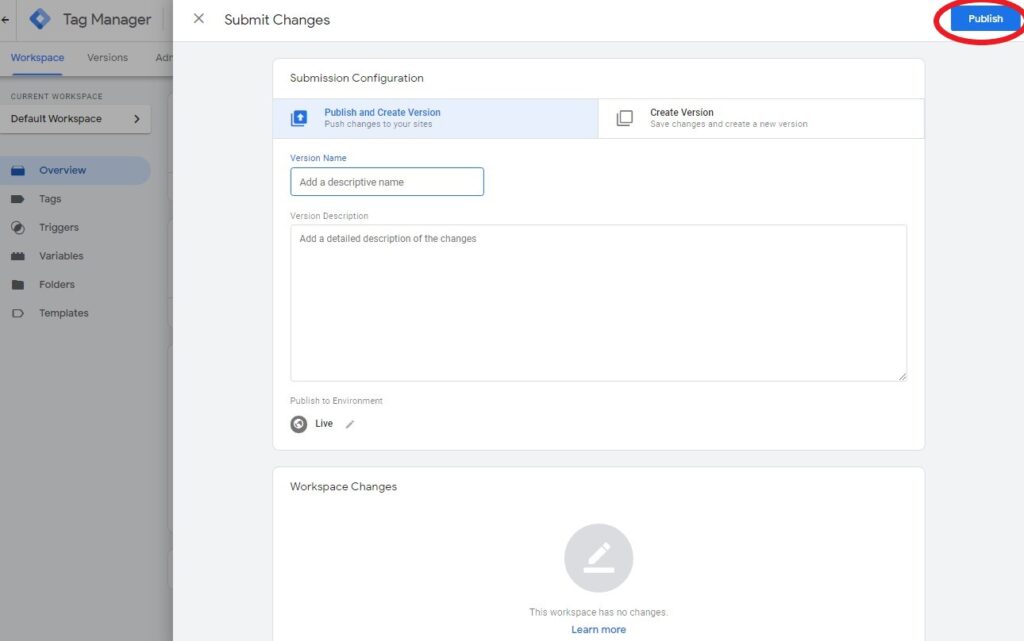
Once the GTM container has been published, the setup process is finally complete. However, we still need to test it to ensure it is working correctly. We can do this by previewing the tag.
Step 4 – Verifying the Google Tag Manager installation
After publishing the container in the previous step, navigate back to the “Workspace” tab in Google Tag Manager, and then click on “Preview” in the top right hand corner.
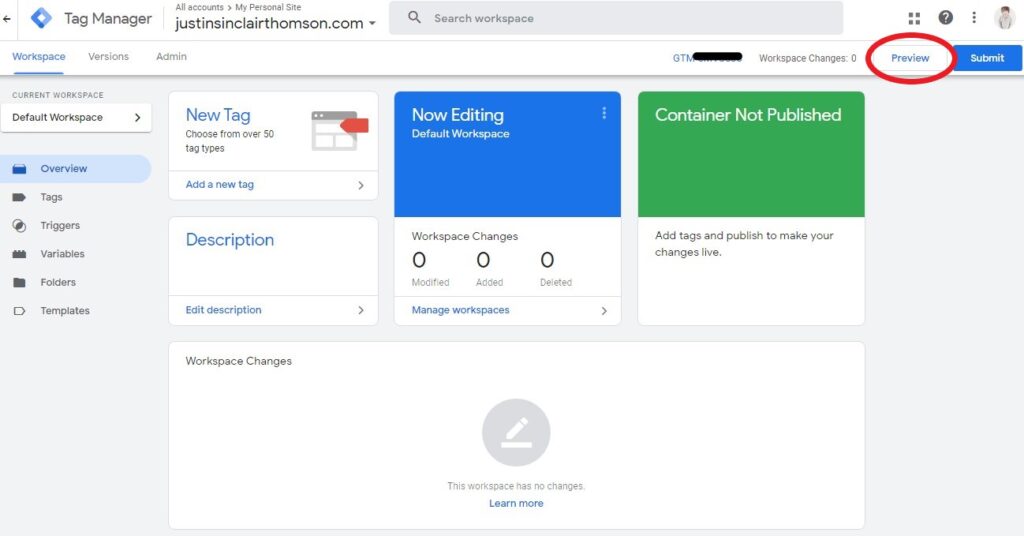
This will open up Google’s new “Start Tag Assistant” in a new browser tab. Enter in your full website URL into the URL field and click “Start” to launch your website in Preview mode.
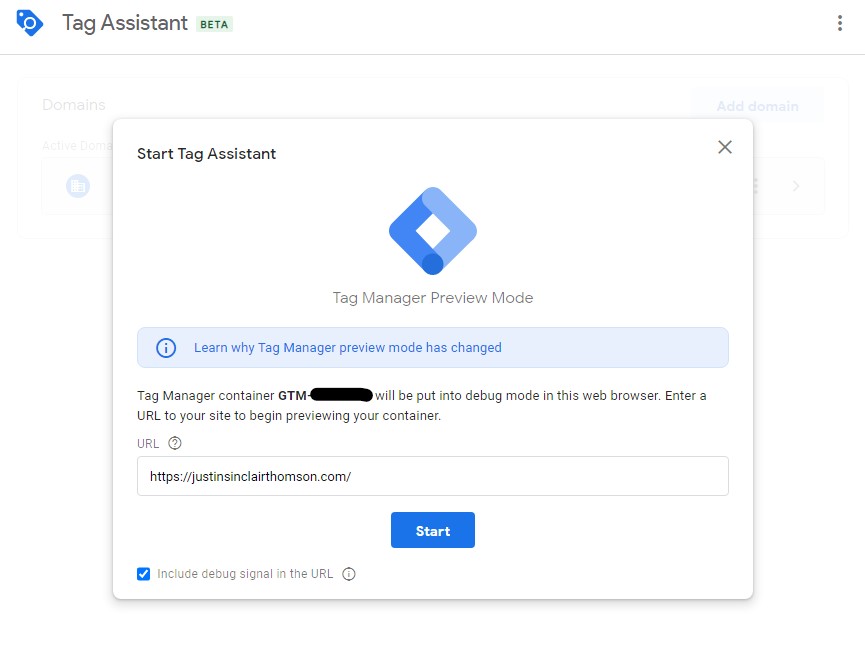
This will load your website in Tag Manager’s Debugger mode. You can then go back to the Tag Assistant browser tab to verify the installation. If your installation was successful, you will see a message saying “Google container found” on the Tag Assistant page. Click on the ‘X’ in the top left corner to end the Preview mode.

That’s it! Your WordPress site now has your Google Tag Manager container installed on all pages of your website, using the correct implementation process as advised by Google. You can now easily implement tags such as Google Analytics, the Facebook Pixel, or other custom tags directly from inside your Google Tag Manager account, without having to touch any of your website code.
If you run into any issues with your Google Tag Manager implementation and need some help, feel free to drop a message in the comments below and I’ll do my best to help you out.

Be First to Comment