The latest version of Google’s web analytics platform, Google Analytics 4, is out of Beta and now available to all users. GA4 features improved predictive insights, better cross-device measuring capabilities and a deeper integration with Google Ads. Follow this guide to learn how to add Google Analytics 4 to your WordPress website using Google Tag Manager.
Adding Google Analytics to any website usually requires editing the website header files to include Google Analytics’ tracking code on all pages. However, Google Tag Manager makes this process much easier with a new set of tags designed specifically for GA4.
This guide assumes you have already created a Google Analytics account with a Google Analytics 4 Property. If you have not yet done either of these, you can create your account and a GA4 Property from the Admin panel in Google Analytics.
This guide also assumes you already have Google Tag Manager set up on your website. If you are not yet using Google Tag Manager, ready my guide for installing Google Tag Manager on a WordPress website.
Step 1 – Set up the GA4 tag for your website.
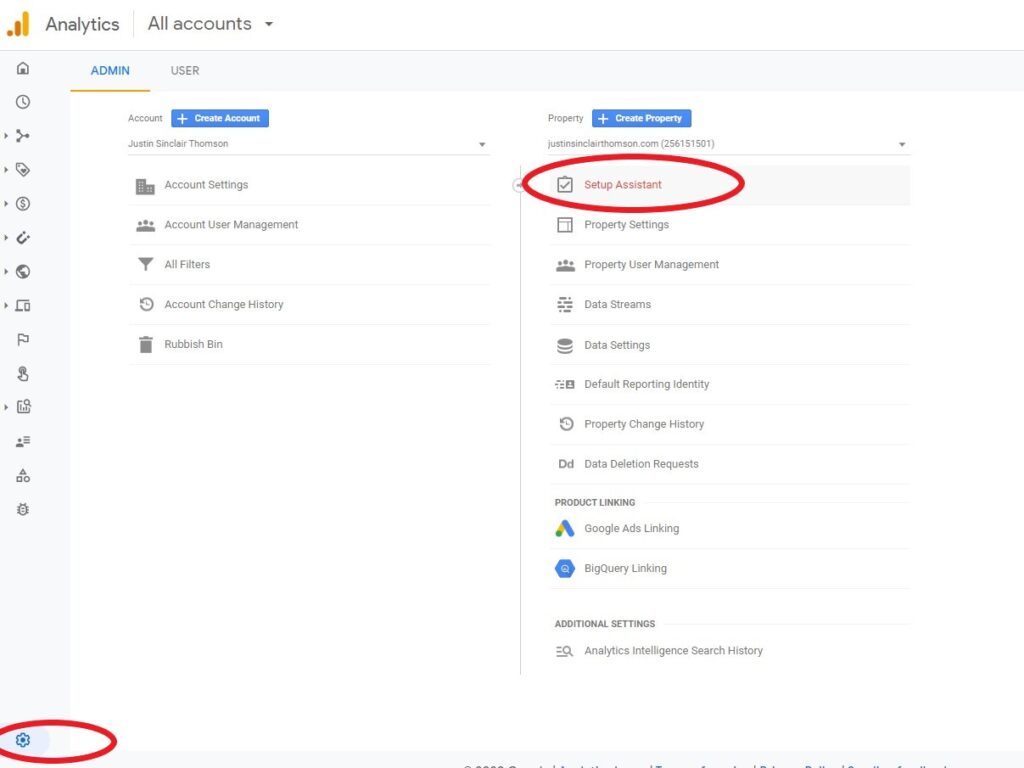
With your GA4 Property created, go to your Admin panel by clicking on the gear icon in the bottom left corner, and then click on Setup Assistant under your Property name.
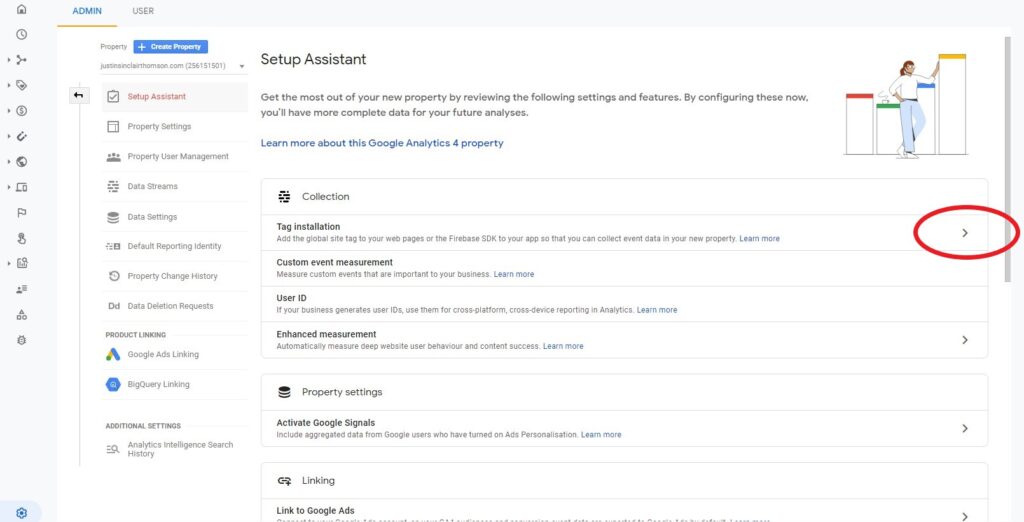
In the Setup Assistant page, click on the right arrow next to “Tag installation” to set up your Google Analytics 4 tag.
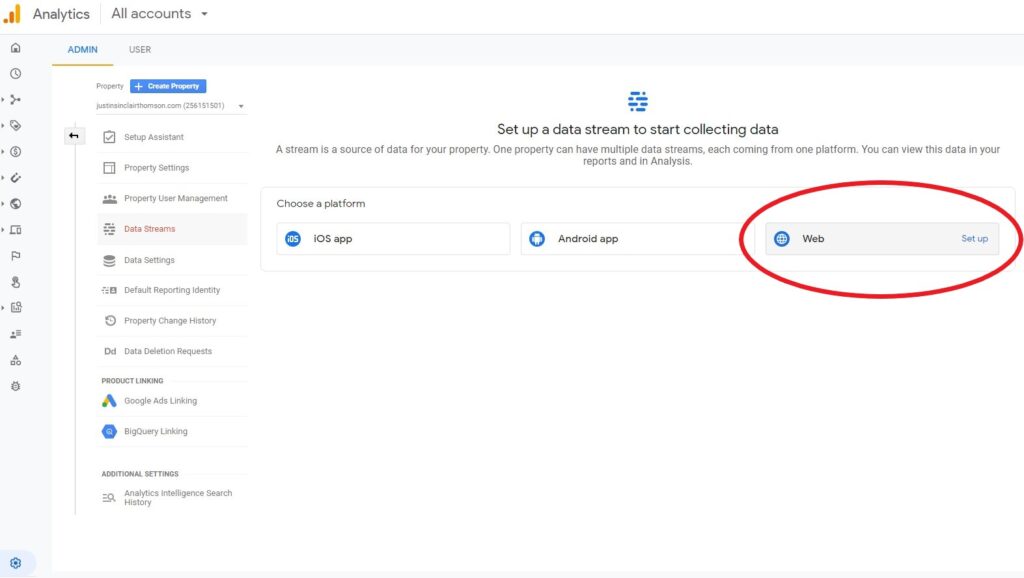
You’ll then be asked to set up a ‘Data stream’ to start collecting data. Your data stream can be one of three platform types:
- iOS App
- Android App
- Web
For setting up GA4 on a WordPress site, you’ll need to select the 3rd option – Web.
You’ll then need to enter in your website URL (without the HTTP/HTTPS) and give the stream a name. Keep the ‘Enhanced Measurement’ option turned on, as this will automatically measure the most common interactions on your website:
- Pageviews
- Scrolls
- Outbound clicks
- Site search
- Video engagement
- File downloads
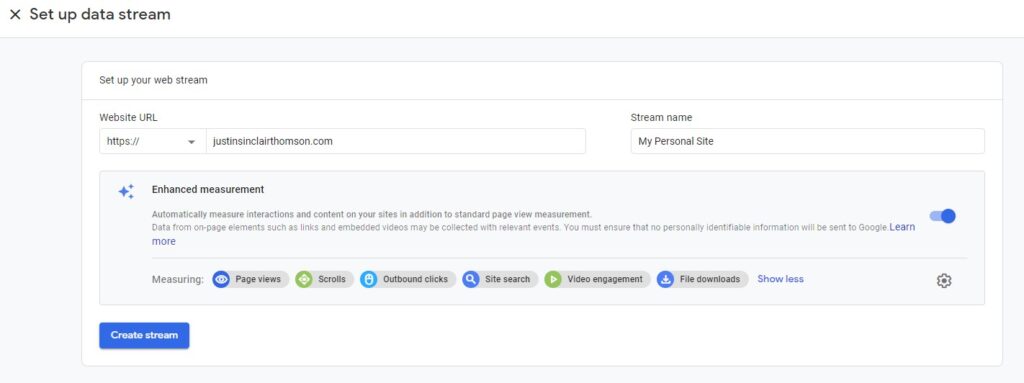
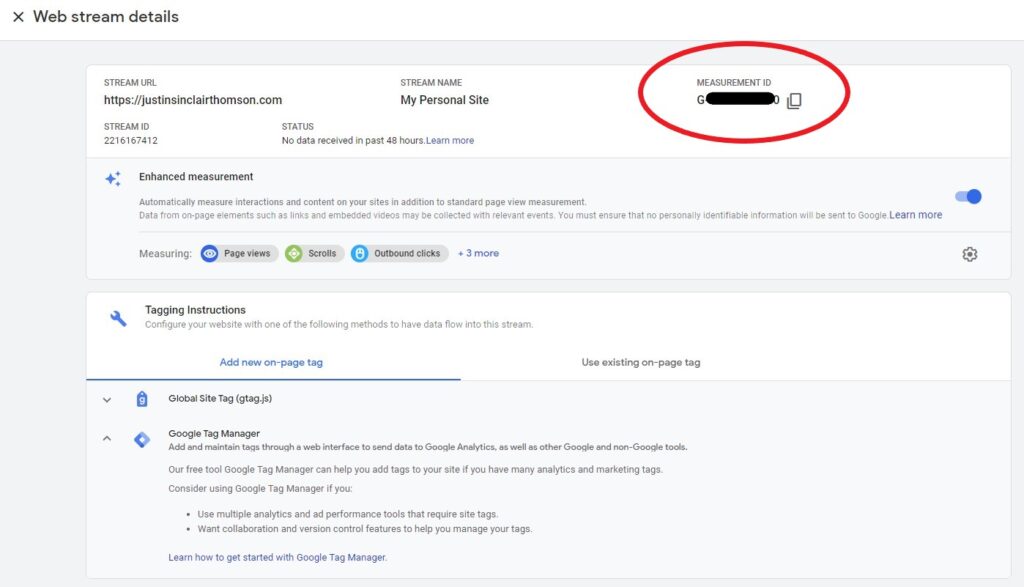
Finally, click on “Create stream” to complete the process. On the next screen, you’ll see your “Measurement ID” in the top right corner of the page. Make a note of your Measurement ID or copy it to your clipboard, as you’ll need to use it in the next step.
Step 2 – Create the tag in Google Tag Manager.
Now you can head over to your Google Tag Manager account and create a new Tag. Give your tag a name that is clear and recognisable for anyone managing your website to understand.
Click on Tag Configuration to choose your tag type, and select the option for “Google Analytics: GA4 Configuration”. You’ll then see an area for you to paste in the Measurement ID you copied from your Google Analytics account.
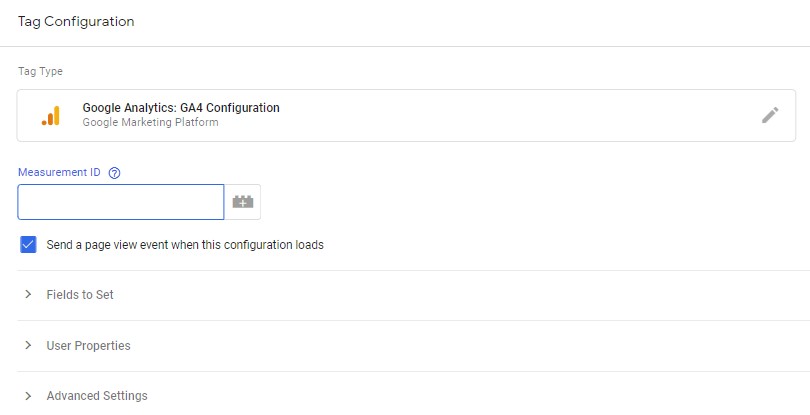
You could simply paste in your Measurement ID here, however, if you think you might be creating multiple GA4 tags to track various events across your website, then you should rather save your Measurement ID in a “Constant” variable. Using a constant variable means you’ll only need to save your Measurement ID once (as a Constant), and the same variable can be used in all of your tags. This also makes it easy to update in future in case you ever need to change the Measurement ID across all of your tags.
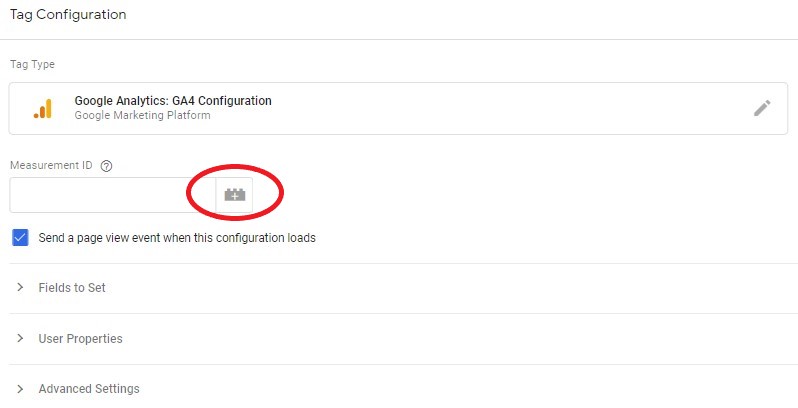
To save your Measurement ID in a variable, click on the little “+” icon to the right of the Measurement ID field:
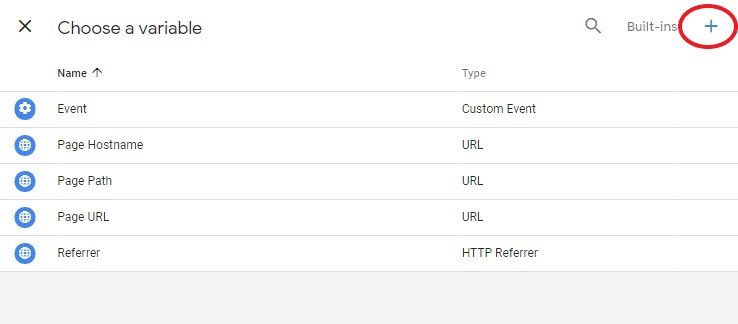
On the next screen, click “+” icon in the top right corner to create a new variable:
As with naming your tag, you’ll also want to give your variable a name that can be understood by anyone managing your Tag Manager account. I like to first state what type of variable it is, and then its purpose. For example: “Constant Variable – GA4 Measurement ID”.
For Tag Configuration, select the “Constant” variable under the ‘Utilities’ section. On the next screen, paste in your Measurement ID from Google Analytics into the Value field:
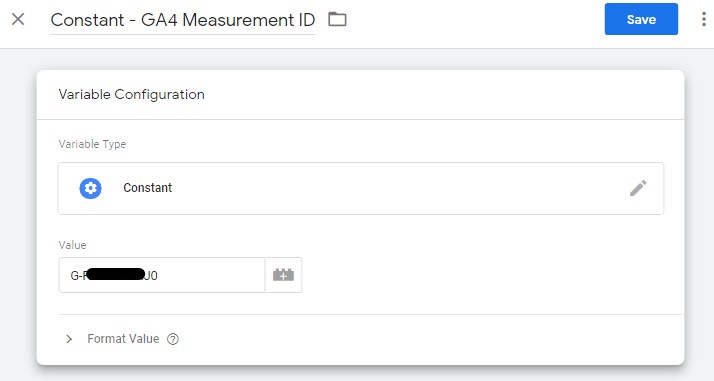
You can then press Save in the top right corner to save your new variable. It should now take you back to the Tag Configuration screen with with your new variable name already included in the Measurement ID value. You’ll notice that variables in Google Tag Manager are inserted into your tags by wrapping the variable name in two curly brackets, eg. {{My Variable Name}}.
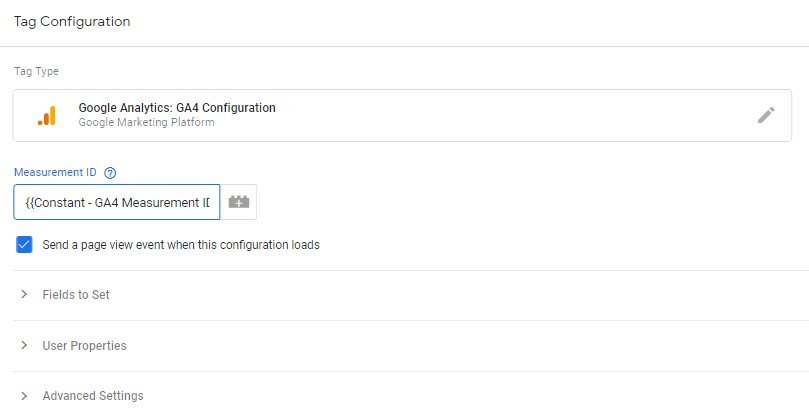
Next, you’ll need to add a trigger, to tell Google Tag Manager when to fire your tag. For our GA4 Configuration tag, we’ll want it to fire on all pages. In the Triggering section below the Tag Configuration area, click to choose a new trigger, and then select the “All Pages” trigger. You can then click Save in the top right corner to save the completed tag.
After saving your tag, don’t forget to click “Submit” in the top right corner to publish your GTM container with your new tag included.
Step 3 – Test the GA4 tag implementation
To test if your tag is set up correctly, go into the Real-time report in your Google Analytics account and see if you are seeing data for visitors currently on your website. If your website is brand new or has a low traffic volume, you might need to go onto your website in a separate browser window and click around between pages. You should be able to identify your behaviour on the website when looking at the Real-time report in Google Analytics.
You’ll now have Google Analytics 4 configured on all pages of your website, and user behaviour will be visible in your Google Analytics account. Having issues with your implementation? Drop a message in the comments below and I’ll try help you out.

Be First to Comment